Backup and Restore Configuration
Preflight (Checklist)
-
A working installation of RADNAC
-
Follow the Quickstart: Getting started with RADNAC if you do not
-
-
Your own Azure Storage Account, below we describe how to set this up
-
You can alternatively use any HTTP endpoint that can serve (
GET) and receive files (PUTorPOST)
-
Steps
If you already have an Azure Storage Account, then you can jump directly to the relevant subsection below.
To create a storage account, follow these steps:
-
Open the main Azure Portal
-
Click on the Create a resource button located in the panel near the top titled ‘Azure services’
-
Search for ‘Storage account’
-
When the search completes, check the ‘Azure services only’ box near the top
-
Locate ‘Storage account’ and click on the Create button
-
Select the subscription to install to, leave the plan set to it’s (only) default value and click the Create button to start the wizard
-
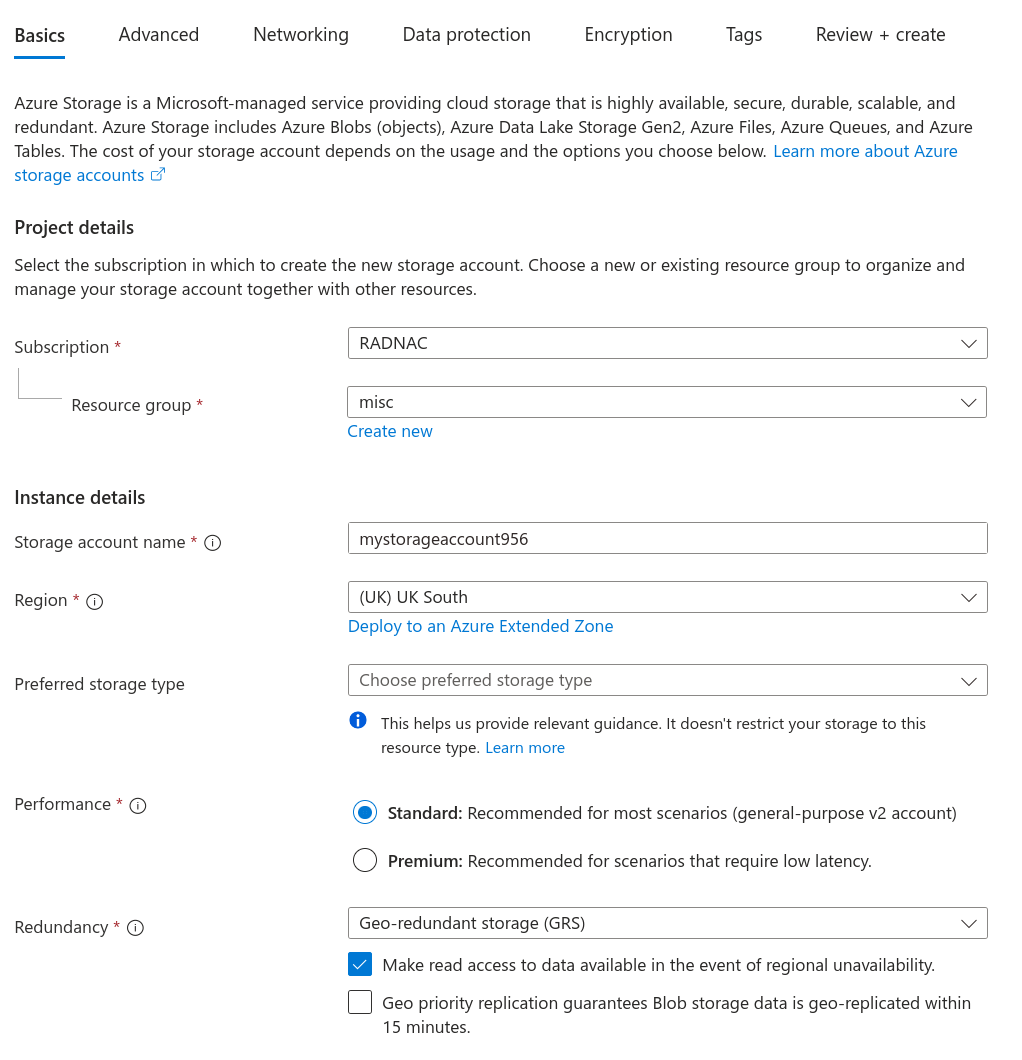
For the ‘Basics’ step
-
Make sure the correct subscription remains selected
-
Select (or create a new) resource group to deploy the Storage Account into
-
Provide a name for the Storage account as well as a location (proximity is not important)
-
Leave other values at their defaults
-
Click on the Next button at the bottom
-
-
For the ‘Advanced’ step
-
Uncheck ‘Enable storage account key access’
-
Check ‘Default to Microsoft Entra authorization in the Azure portal’
-
Leave other values at their defaults
-
Click on the Next button at the bottom
-
-
Skip all remaining steps by clicking on the Review + create button at the bottom
-
Click on the Create button at the bottom and wait for the deployment to complete
-
Once complete navigate to your newly created Azure Storage Account
-
Navigate from the left menu from
-
Under the ‘Role’ tab, select ‘Storage Blob Data Contributor’
-
Either click on the Next button or navigate to the ‘Members’ tab
-
Verify that ‘Selected role’ reads ‘Storage Blob Data Contributor’
-
Set ‘Assign access to’ to ‘User, group, or service principal’
-
Click on the Select members button
-
In the panel that appears to the right, find your own user account, click on it to add it to the ‘Selected members’ list at the bottom of the panel and then click the Select button
-
Click on the Review + assign button and confirm once again by clicking on the Review + assign
-
Navigate to the menu , provide a name (for example ‘radnac’) and click on the Create button
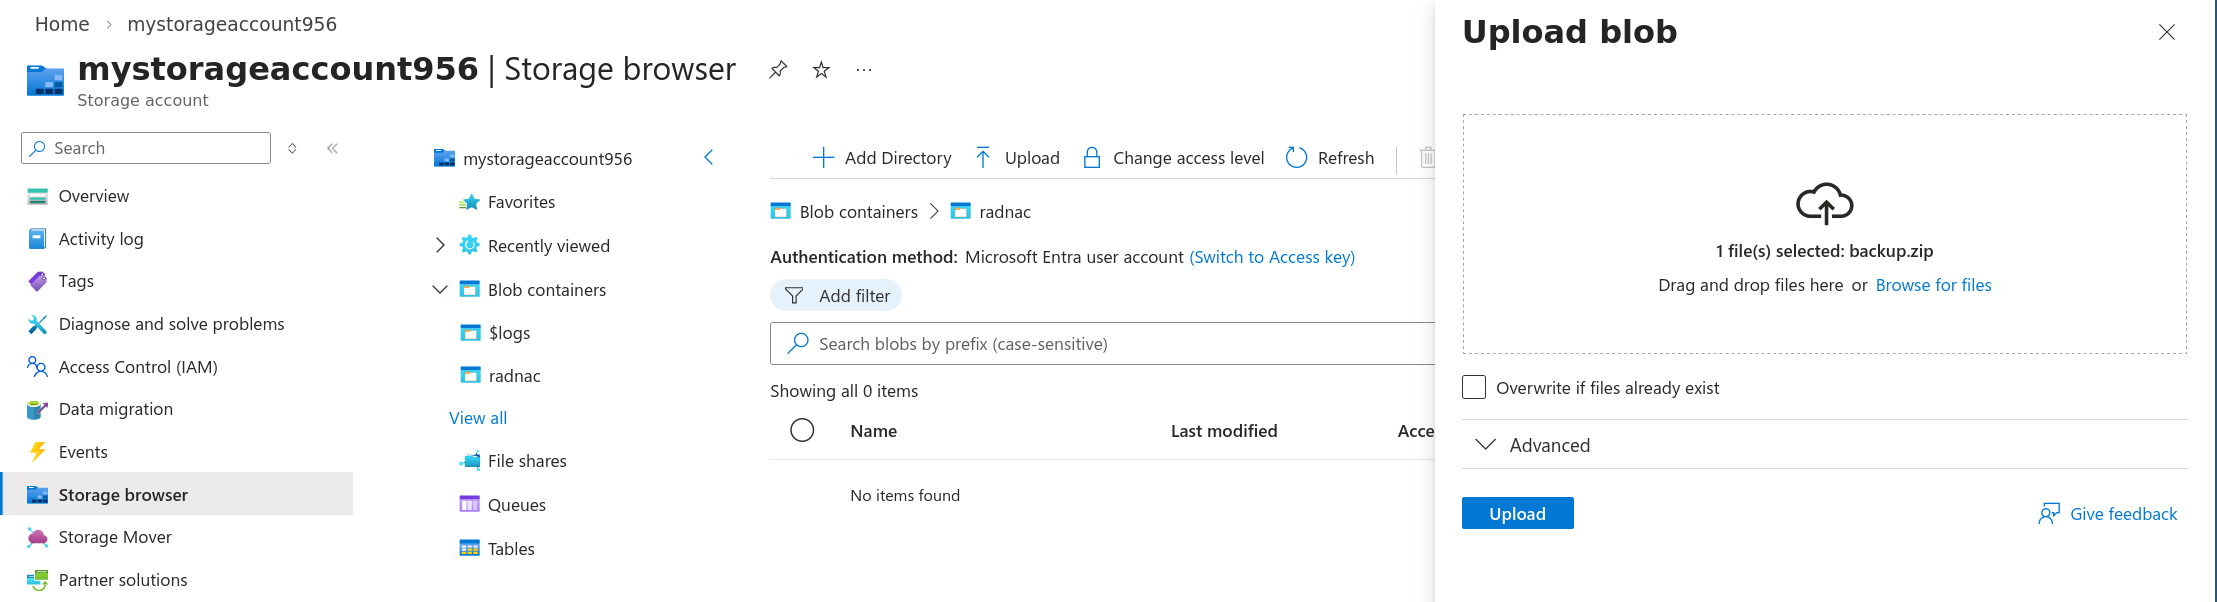
For the backup process below, it can be made a lot easier by uploading a dummy placeholder ZIP file which is performed by:
-
Creating a ZIP file on your workstation
-
Recommended you call it
backup.zip -
It may be empty or contain dummy data, it does not matter as this file will be overwritten almost immediately
-
-
Navigate to your Azure Storage Account and go through the menu then click on the Upload button at the top of the page
-
Either drag or browse to your dummy ZIP and then click on the Upload
Backup
|
The passwords for local user accounts created within RADNAC as well as device shared secrets and PSKs will be exported in plaintext. It is your responsibility to make sure only trusted staff are able to access any backups made. For devices, it is a requirement that shared secrets and PSKs be plaintext recoverable otherwise authenticating RADIUS equipment connecting to RADNAC would be impossible. For local user accounts (not your Microsoft Entra ID accounts), this is a known issue and one that will be resolved shortly. |
The process depends on if you are using an Azure Storage Account or not:
- Using an Azure Storage Account
-
-
Navigate to your Azure Storage Account.
-
Go through the menu .
-
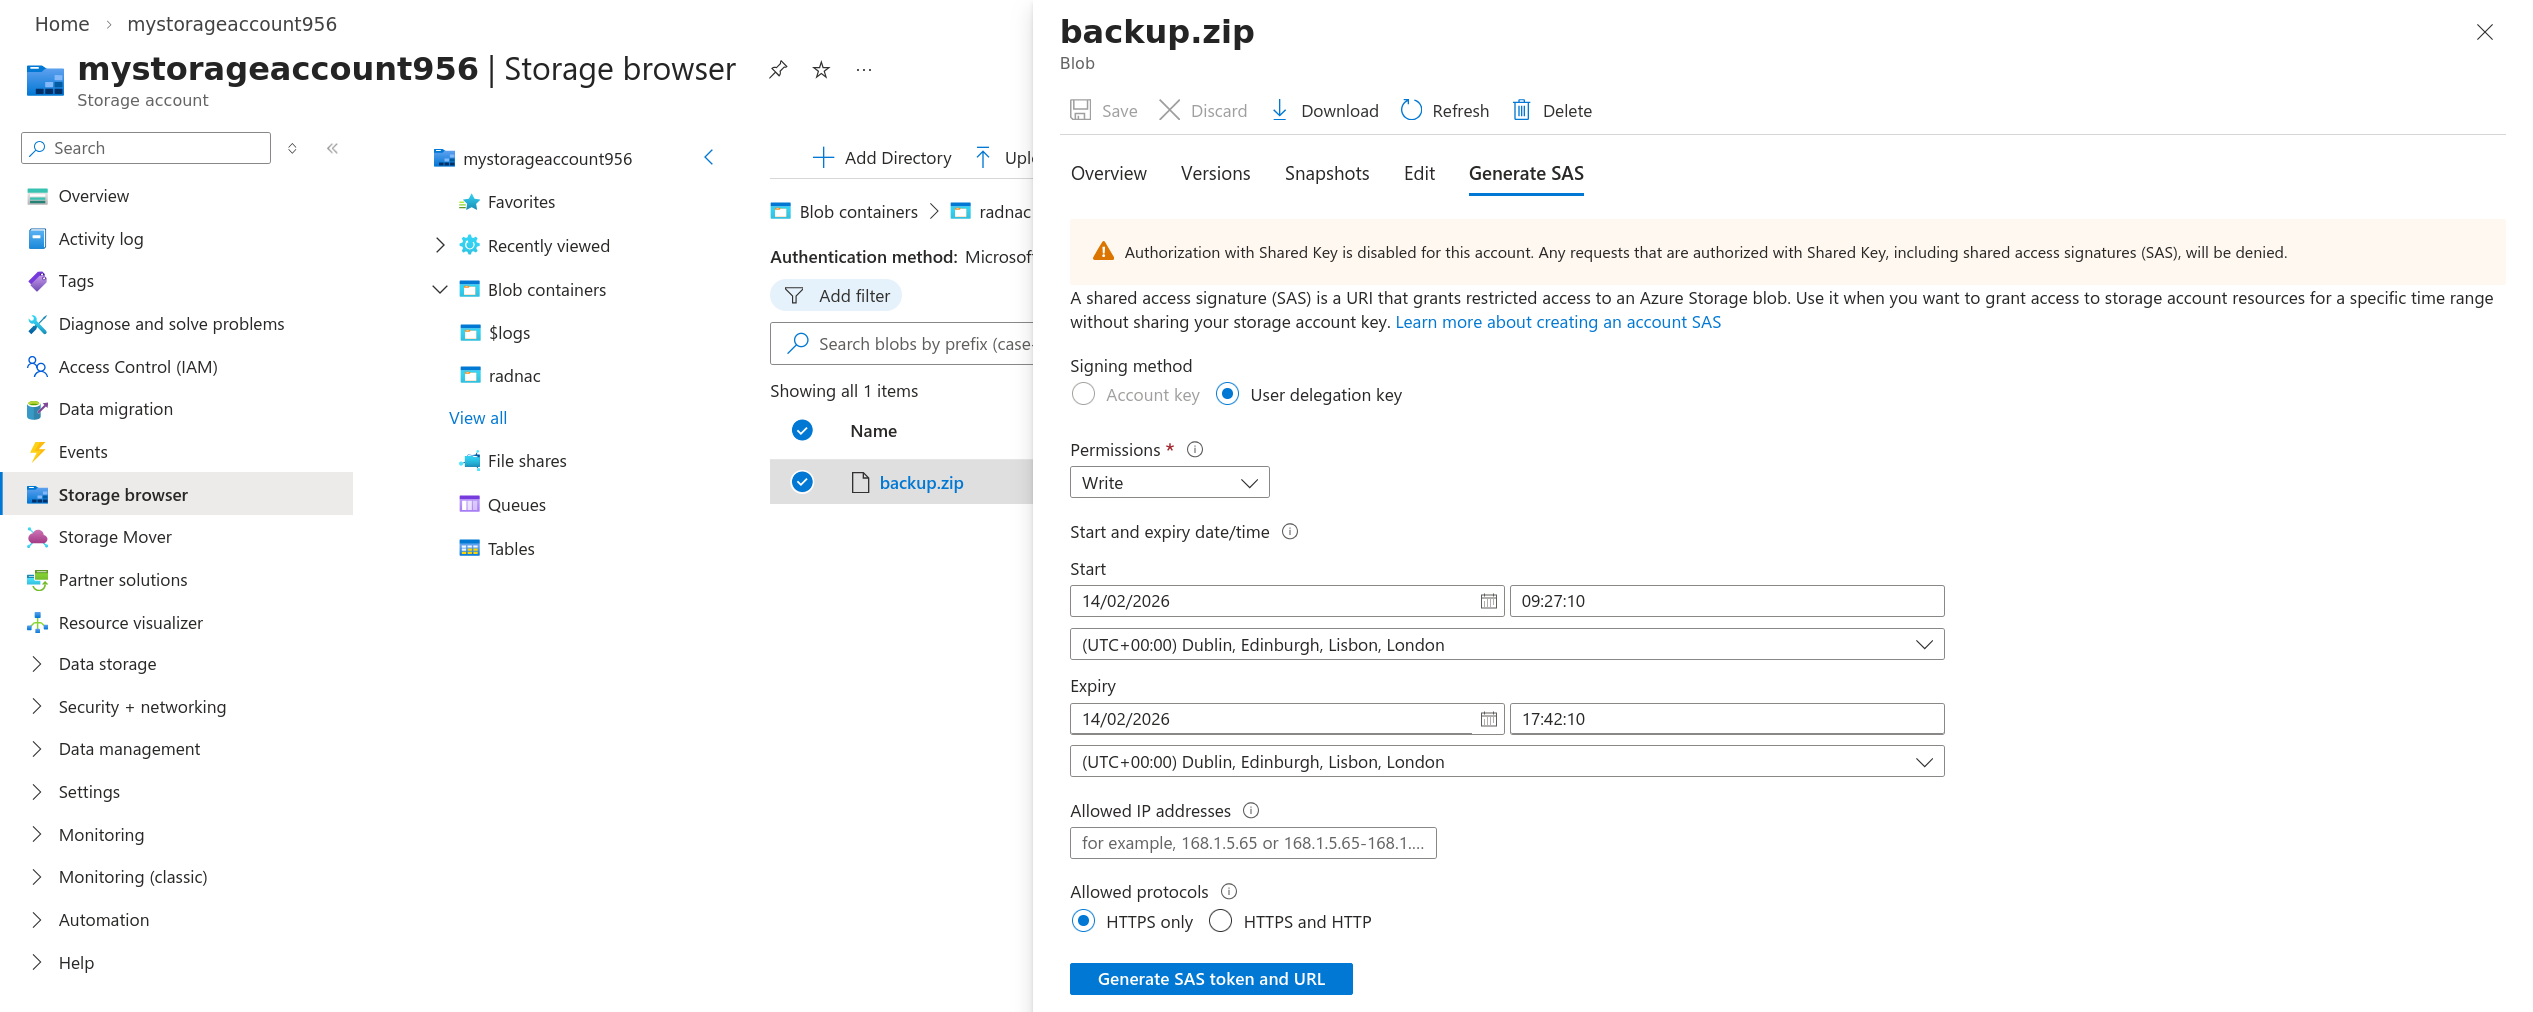
Click on your dummy placeholder ZIP and in the panel that appears to the right click on the ‘Generate SAS’ tab.
-
Set ‘Signing method’ to ‘User delegation key’
-
Set ‘Permissions’ to only ‘Write’.
-
Optional, though recommended, is to reduce the ‘Expiry’ time to be no more than an hour into the future.
-
Verify that ‘Allowed protocols’ is set to ‘HTTPS only’.
-
Click on the Generate SAS token and URL.
-
From the two text boxes that appear, make a note of the value provided in the ‘Blob SAS URL’ box.
-
Close the right side panel as it is no longer needed.
-
- Using something else
-
You will need to provide a URL that accepts a HTTP
PUT(orPOST) request
Once you have a suitable URL to use:
-
Navigate to the web user interface
-
Click on the Backup button at the top right
-
Make sure ‘HTTP Methods’ is set to what the URL expects
-
If you are using an Azure Storage Account URLs, use ‘PUT’ which is the default
-
-
Paste in the URL
-
If you are using an Azure Storage Account, this is the ‘Blob SAS URL’ you made a note of above
-
-
Click on the Submit button to start the backup
-
This should take no longer than ten (10) seconds.
-
-
For Azure Storage Account users, if you navigate back to you will find the
backup.ziphas been replaced with a new file which you can download
Restore
The process depends on if you are using an Azure Storage Account or not:
- Using an Azure Storage Account
-
-
Navigate to your Azure Storage Account.
-
Go through the menu .
-
Click on your dummy placeholder ZIP and in the panel that appears to the right click on the ‘Generate SAS’ tab.
-
Set ‘Signing method’ to ‘User delegation key’
-
Set ‘Permissions’ to only ‘Read’.
-
Optional, though recommended, is to reduce the ‘Expiry’ time to be no more than an hour into the future.
-
Verify that ‘Allowed protocols’ is set to ‘HTTPS only’.
-
Click on the Generate SAS token and URL.
-
From the two text boxes that appear, make a note of the value provided in the ‘Blob SAS URL’ box.
-
Close the right side panel as it is no longer needed.
-
- Using something else
-
You will need to provide a URL that accepts a HTTP
GETrequest
Once you have a suitable URL to use:
-
Navigate to the web user interface
-
Click on the Restore button at the top right
-
Paste in the URL
-
If you are using an Azure Storage Account, this is the ‘Blob SAS URL’ you made a note of above
-
-
Click on the Submit button to start the restore.
-
This should take no longer than thirty (30) seconds.
-